From Code to Kodachrome: Film Emulation from Scratch
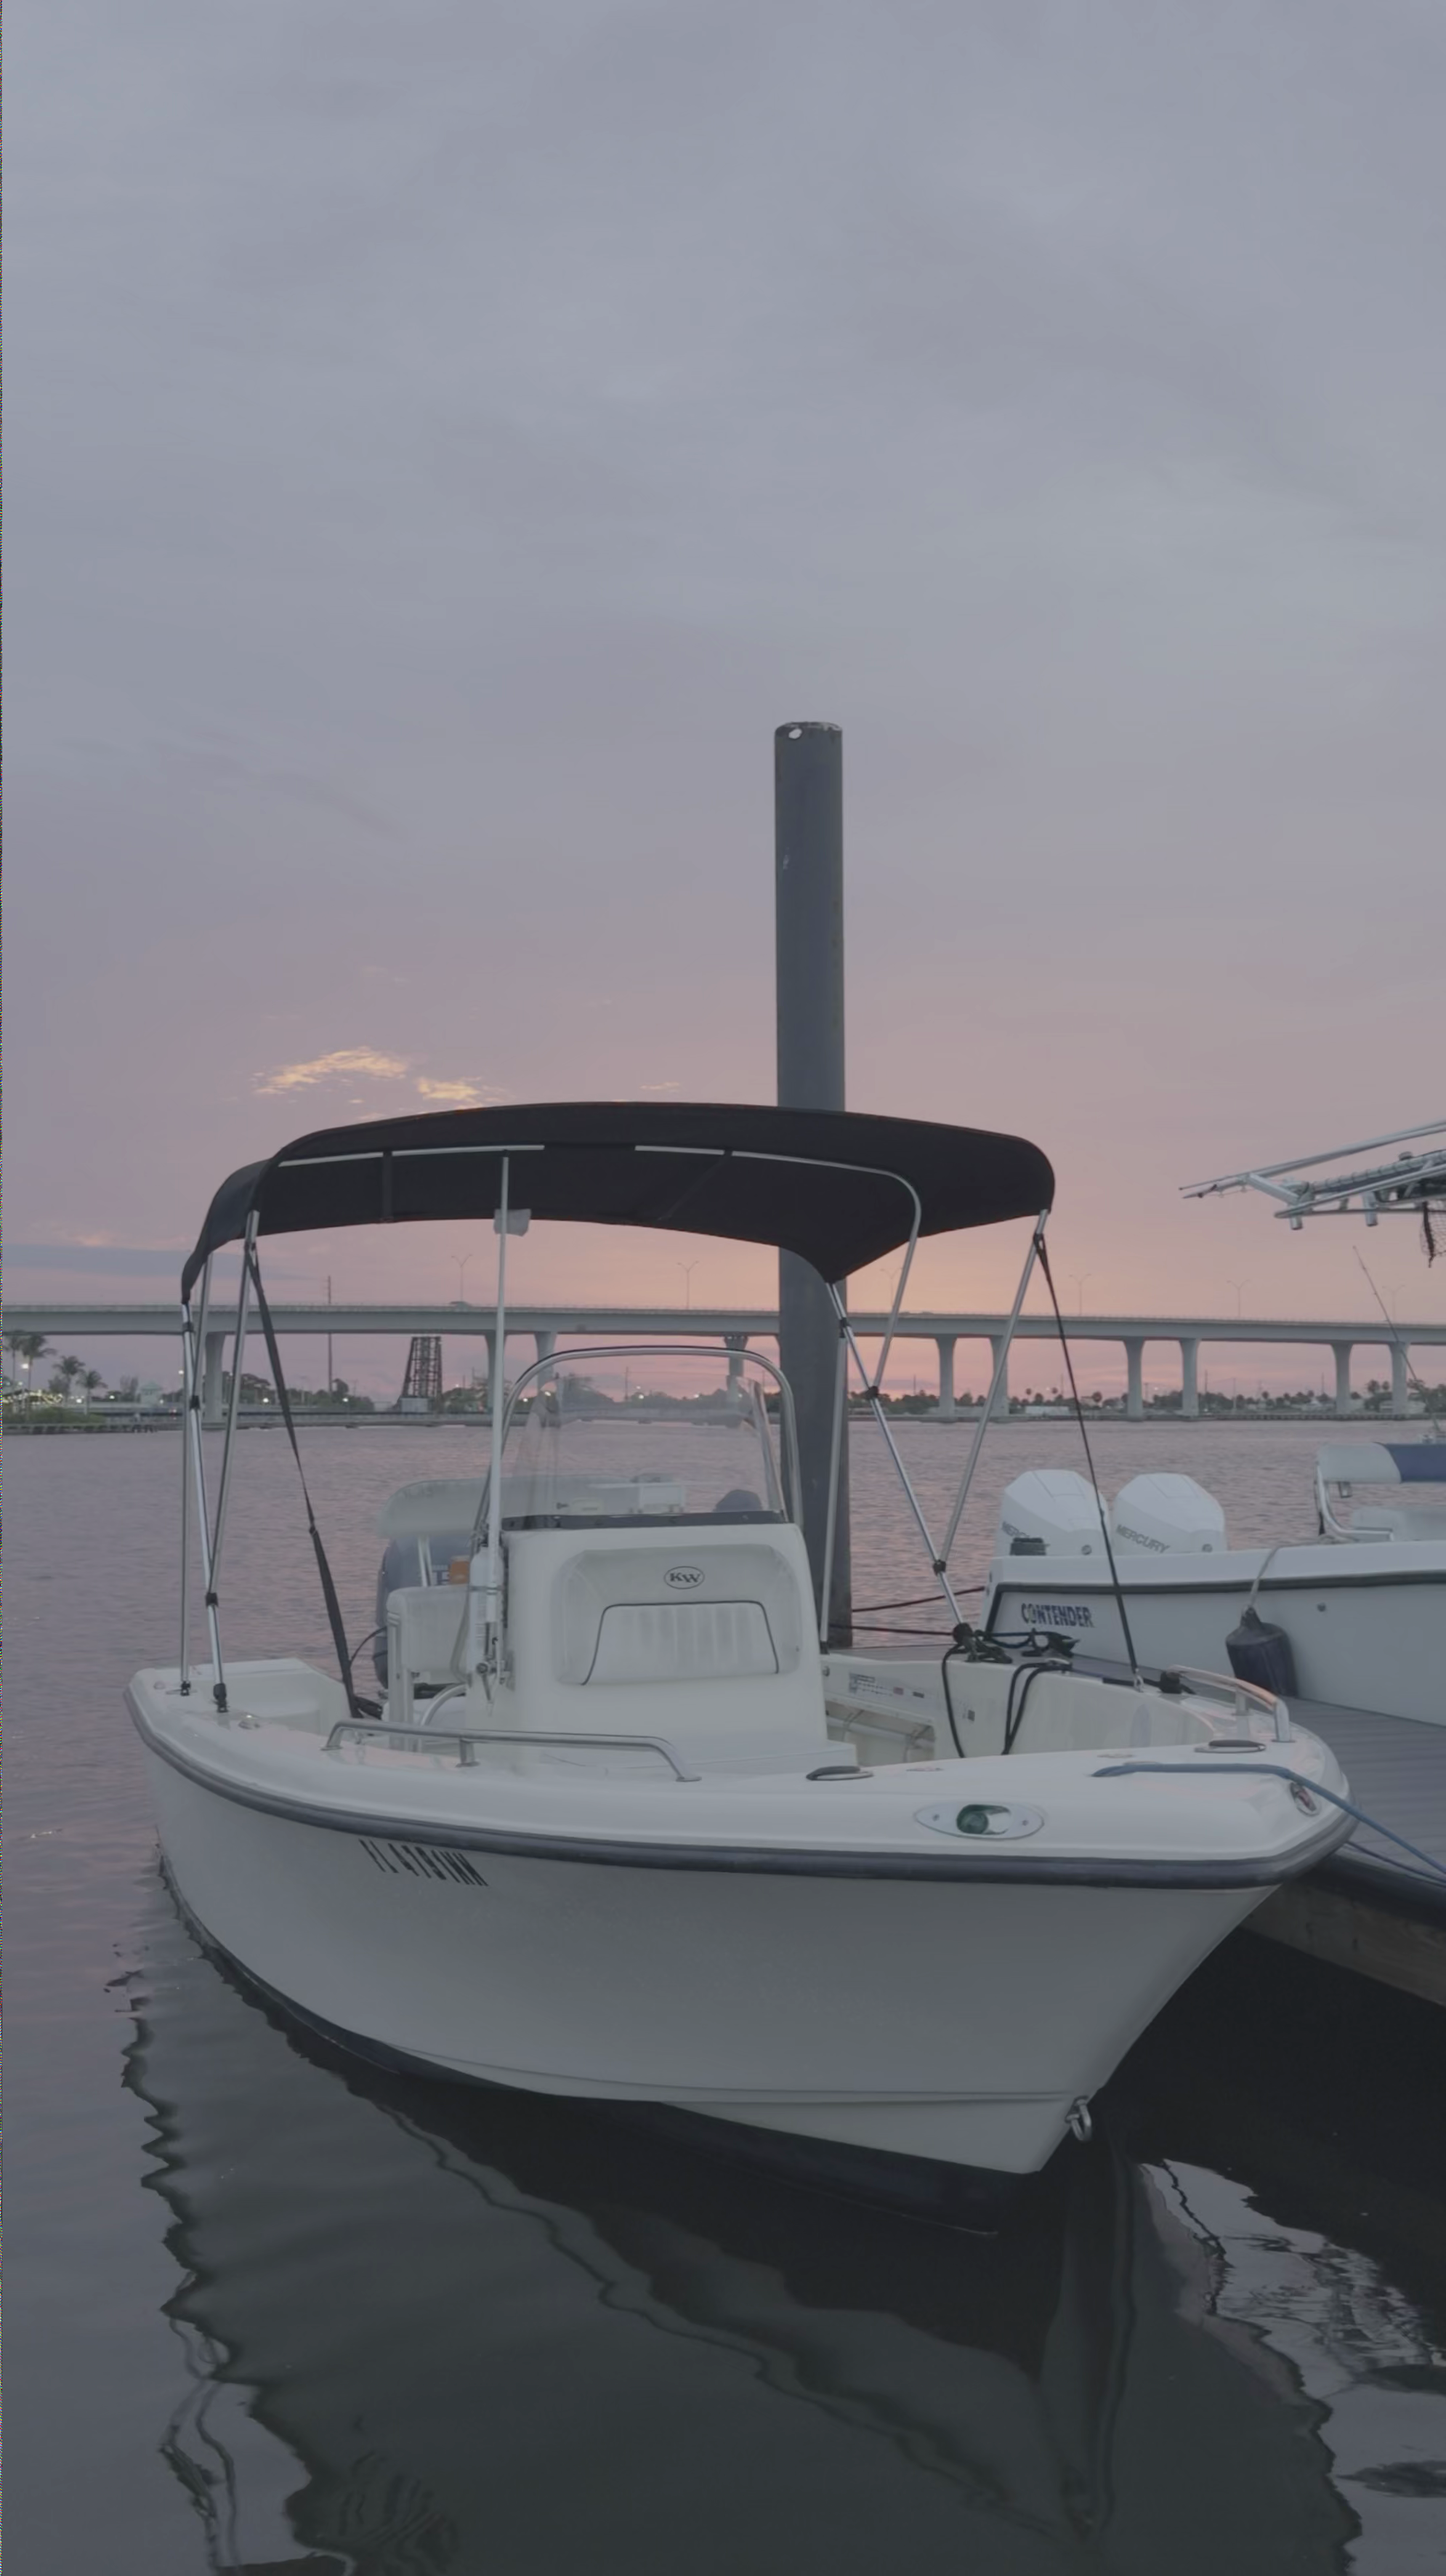
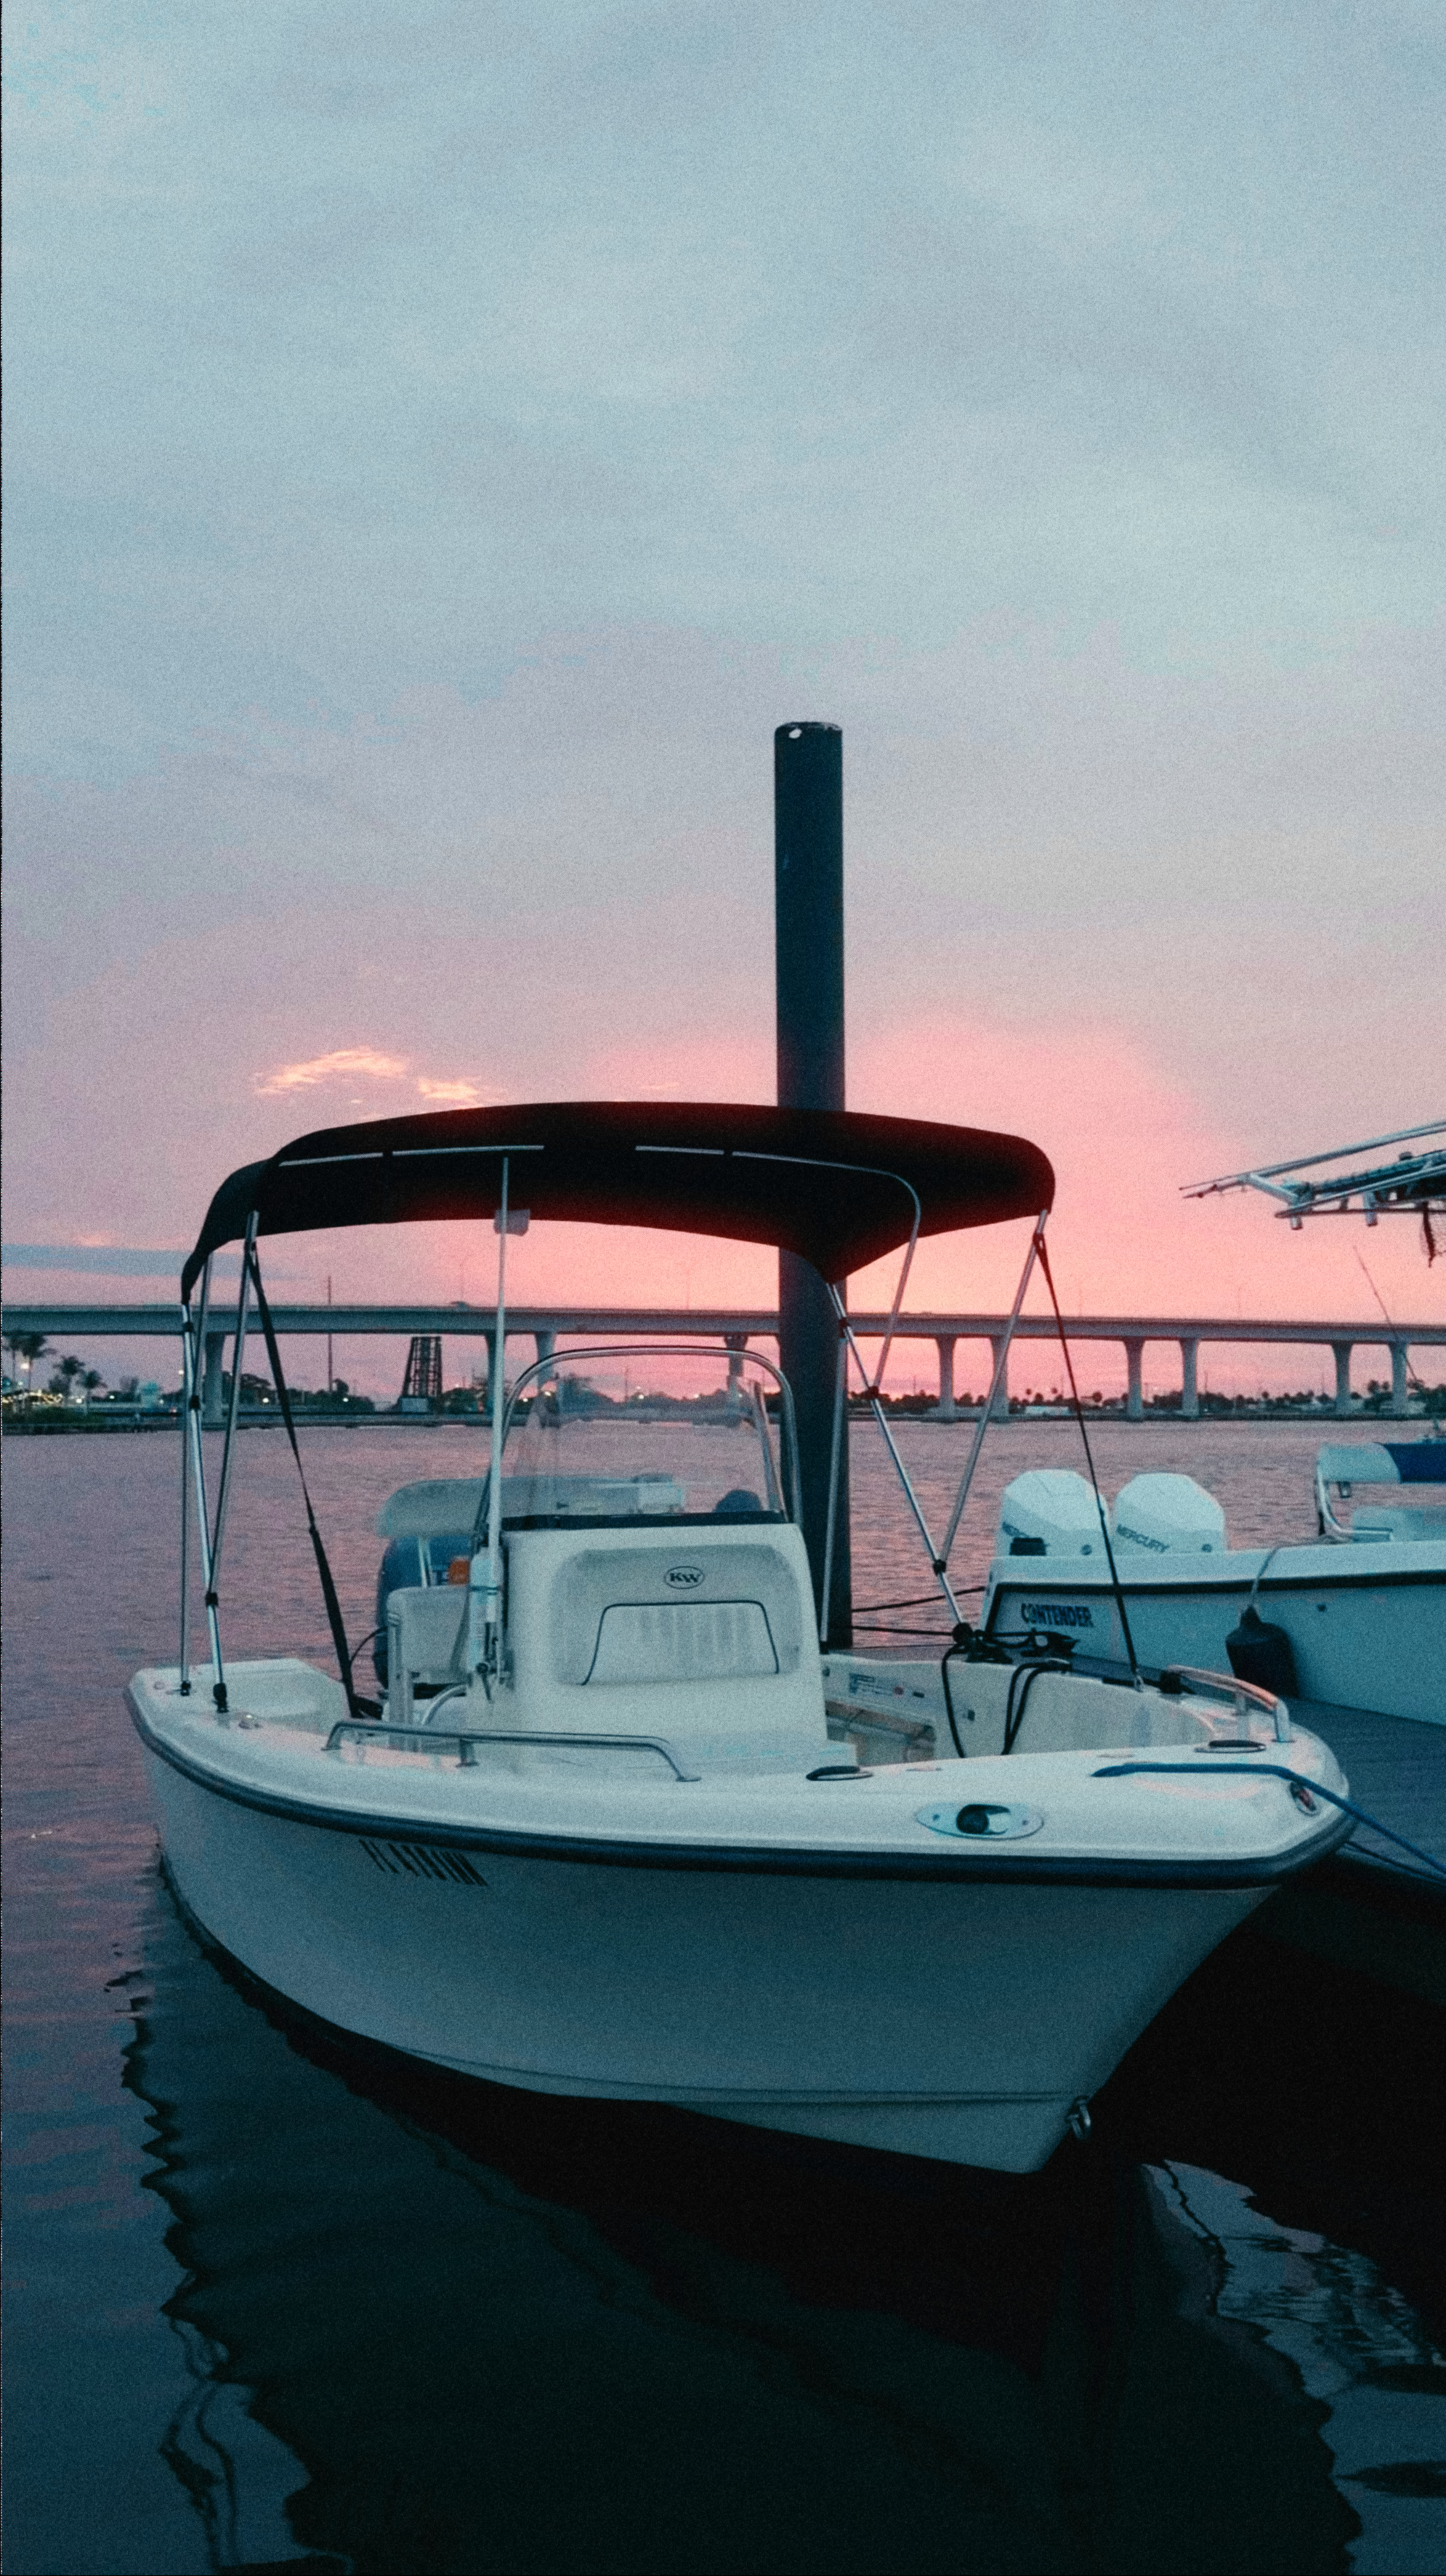
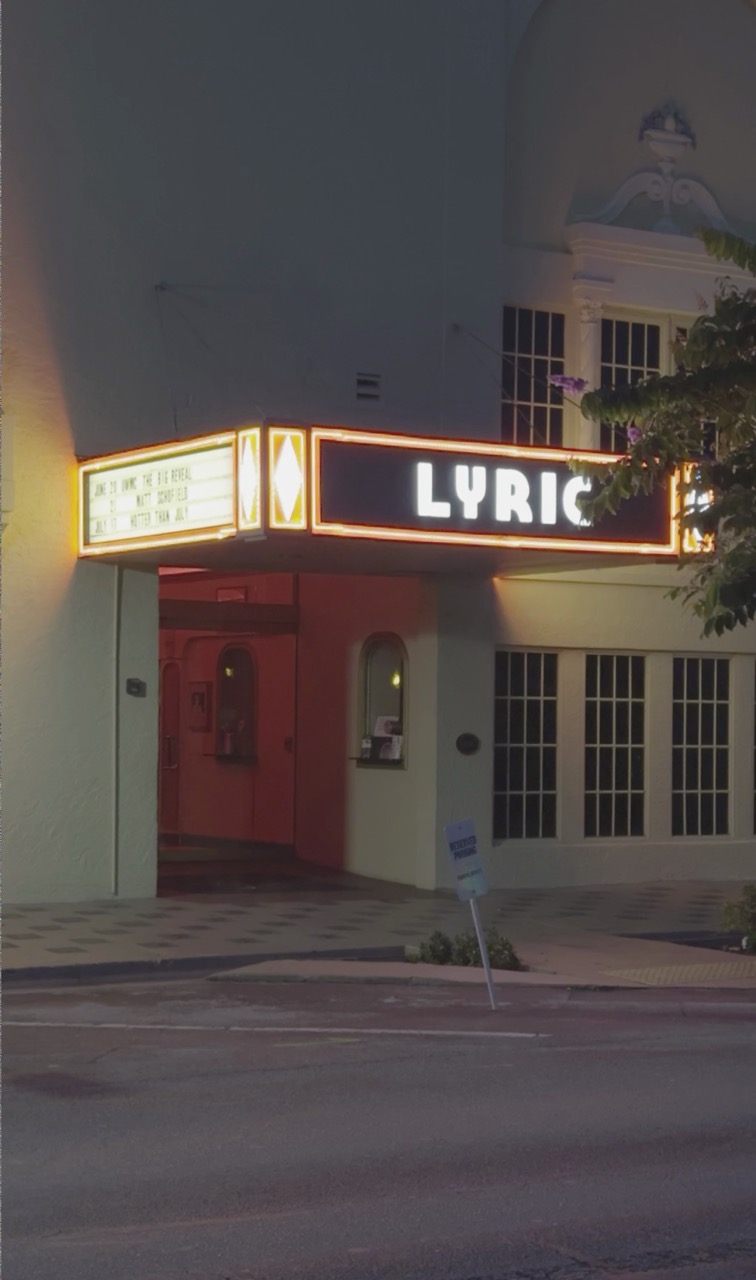
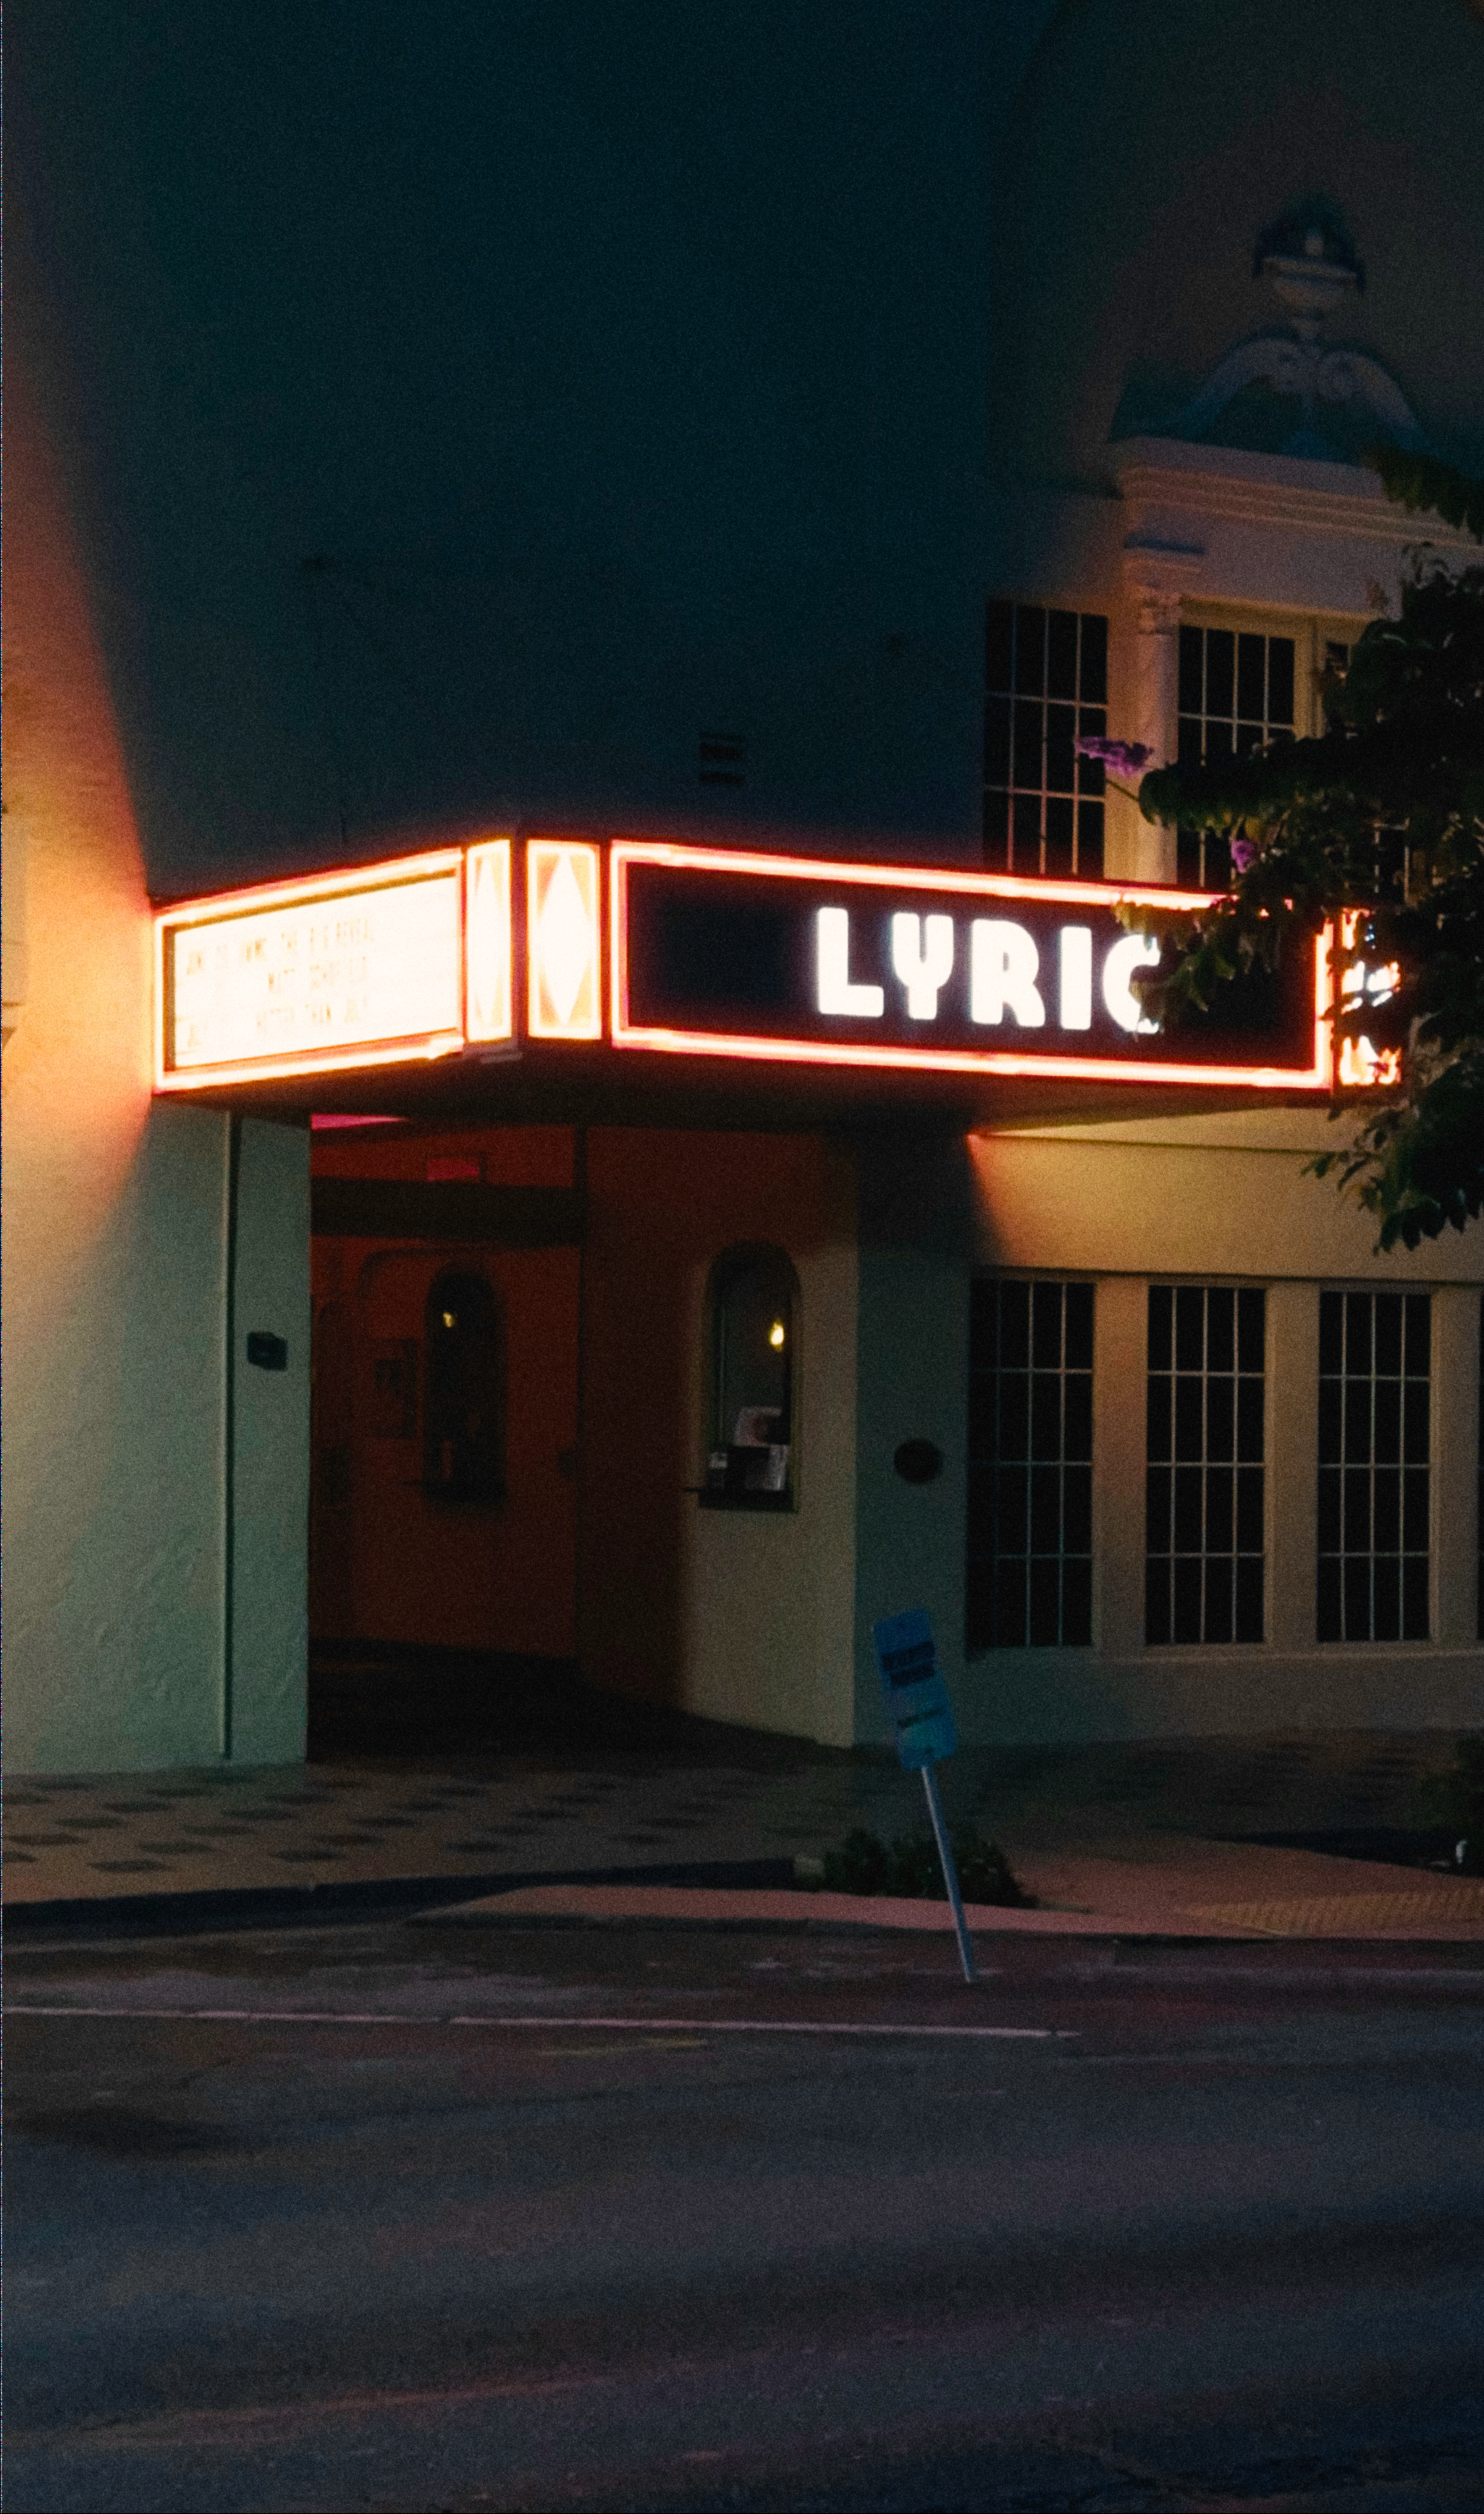
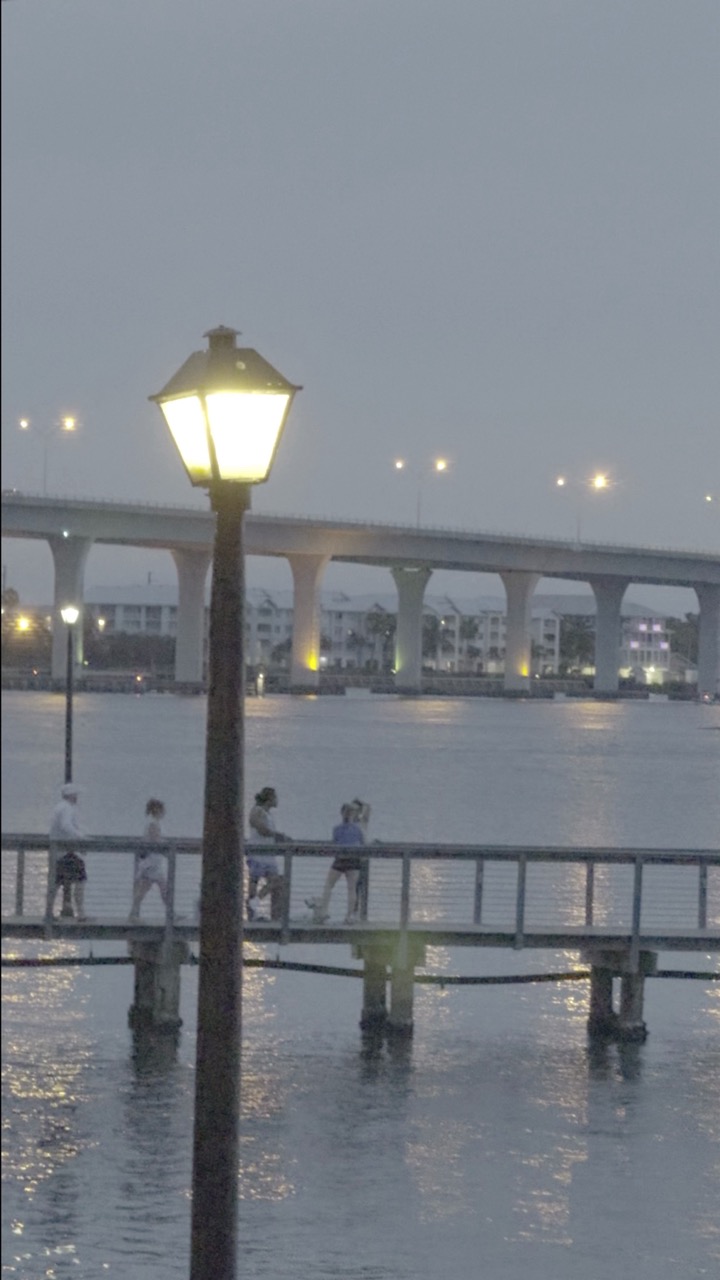
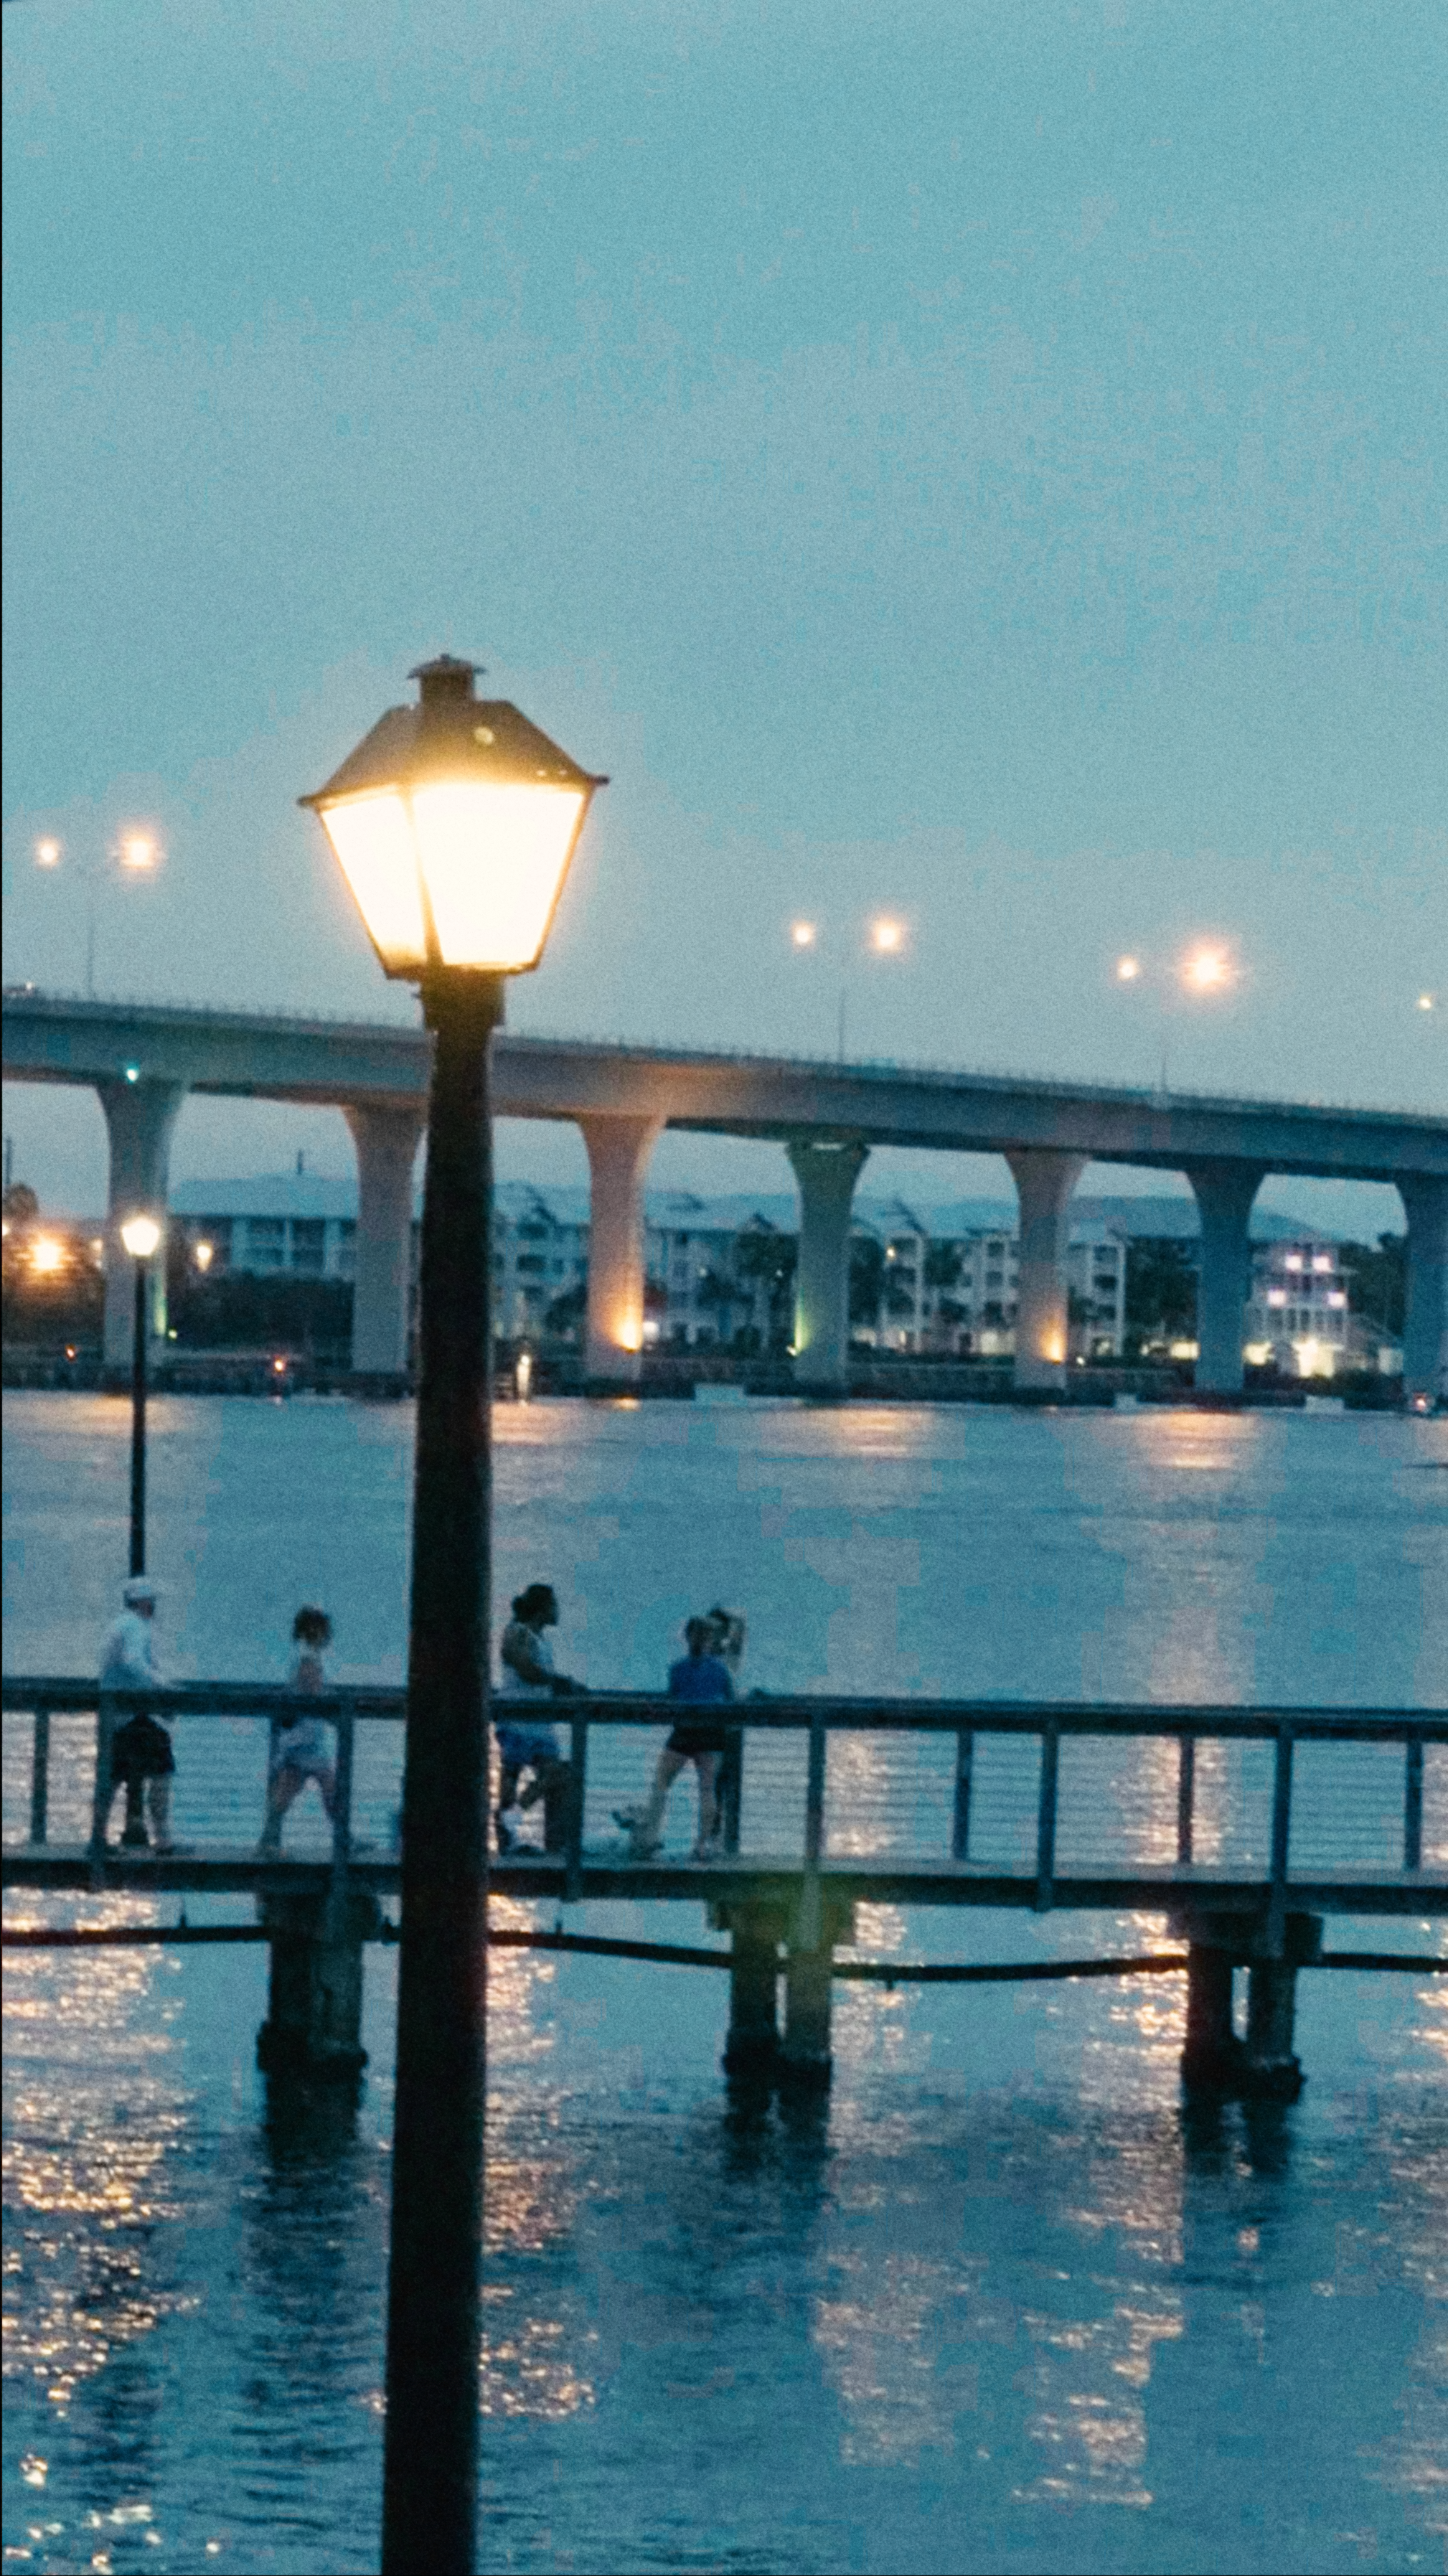
 Before
After
Before
After
Introduction
Film photography has a certain sense of warmth and nostalgia that traditionally cannot be achieved with a digital photograph. Often, I want to create the character of film without the drawbacks of cost and time to develop film.
This leads me to the world of film emulation, which aims to convert a digital photograph to one that looks like film. The most highly-regarded tool in this field is Dehancer, but it comes at a price tag of several hundred dollars, which may be expensive for a hobbyist.
Being a software developer specializing in graphics programming, I thought it would be interesting to make my own film emulation software. The rest of this article will present before/after photographs using my software, discuss limitations, future work that could be done, then give technical details for anybody who is working on a similar project or wants to replicate my work.
All code for this project is open-source on GitHub.
Gallery
 Before
After
Before
After
 Before
After
Before
After
 Before
After
Before
After
 Before
After
Before
After
Limitations
My algorithm creates good images, but it still requires work. The most obvious and least quantifiable issue is that the photographs do not completely feel like film — the images are still distinctly digital. There are likely several factors at play, but I speculate that the most significant factors are: (1) I use an iPhone to take the pictures (2) the color grading is not completely filmic.
The iPhone camera is significant due to the optics of a small camera. The most notable difference is the wide depth of field: a large portion of the image is in-focus. Depending on the aperture settings, larger cameras, including film cameras, blur the background more. iPhone photos may also have a sharpness not present in film. The resulting image feels different.
I achieve the film colors by applying a LUT (lookup table) which maps the input image colors from a digital camera to colors that emulate a specific film stock. However, filmic LUTs serve as a "one size fits all" application and may not provide satisfactory results for any one specific image.
The LUT I use gives color banding artifacts, especially in areas where there are gradual changes in colors like the sky. The film grain masks this artifact, but it still can be ugly if you are aware of it.
This project has taught me that the "film look" is highly subjective because there is a diverse set of film media. I have asked three different people for advice and got three conflicting suggestions. Sareesh Sudhakaran covers the subjectivity of the film look when he discusses how he emulated the film look for his feature film (Sudhakaran 2024). Interestingly, the hard part isn't changing the algorithm but knowing what change to make.
Also, adding film grain uses a procedural method that requires around three minutes to compute for a 4K image while using all cores of my M4 MacBook Pro. This makes fine-tuning algorithm parameters tedious due to the long wait. This is a minor limitation once the algorithm is complete, since processing a set of images can be done in bulk in the background.
Future Work
While these results show potential, a deeper exploration of what defines a filmic look is needed. With a dataset of matched film and digital image pairs — unedited and captured under identical conditions (same focal length, camera/film stock, and composition) — I could quantify the differences in color and noise/grain then try to create an algorithm to emulate this.
I am also curious how an AI training technique called a GAN (Generative Adversarial Network) could be used for film emulation. It will have one AI that attempts to modify an image to look like film, and another AI that attempts to detect film versus digital images. The AI that modifies the image will have to fool the AI that detects whether an image is digital vs film. Although, this architecture can be tricky to get working.
Technical Details
This section is meant for software developers who want to create a similar project or replicate my work. This section may be a bit dense if you do not have a background in photography or computer graphics.
I took all photos with an iPhone 16 Pro.
The Input Is... a Video?
The input to this algorithm is not actually an image, but a video. It takes the first frame of the video and treats it as a photograph. This is due to my utilization of the Apple ProRes Log video, which the iPhone 15 and 16 Pro/Pro Max models can record in.
I found LUTs by Tobia Montanari which converts from Apple ProRes Log to Rec.709 with filmic colors, modified from the LUTs from DaVinci Resolve (Montanari 2025).
Using Log video probably wasn't completely necessary: a RAW photo would have provided a lot of data. But Apple ProRes Log applies less processing than a RAW photo since RAW photos in iPhones still apply quite a bit of processing. Using a DSLR camera would avoid this problem, but I chose not to pursue that route for this project. With a little more effort, you can convert the current algorithm to input a raw image from a DSLR camera, though.
Here's what a Apple ProRes Log "photo" looks like compared to the photo with the filmic LUT applied.
 Apple ProRes Log
LUT Applied (Rec.709)
Apple ProRes Log
LUT Applied (Rec.709)
Lastly, I convert from Rec.709 to linear color space, since linear better represents the physical radiance of light. This is useful for any effect we are applying since it gives it more of a physical basis. Here's the image in Rec.709 compared to linear color space.
 LUT Applied (Rec.709)
Linear
LUT Applied (Rec.709)
Linear
For the rest of the article, assume all processing is done in linear color space unless otherwise specified. All photos will be displayed in Rec.709 color space from now on since it shows details in the shadows.
The Lack of Bloom
Bloom is an effect where bright areas of an image bleed over into darker areas. Graphics programmers have adopted the term "bloom," but the effect is predominantly due to two physical phenomena. Bloom is present in any optical system, including the human eye. However, it is exaggerated in film due to film emulsion, especially in small film stocks like 8mm (Dehancer Blog).
Bloom is not a part of my implementation because I was unaware of how much film contributes to the effect at the time of writing my program. If I were to revisit this project, bloom will be on the list of features to add, but it will require special consideration to avoid overwhelming the halation effect.
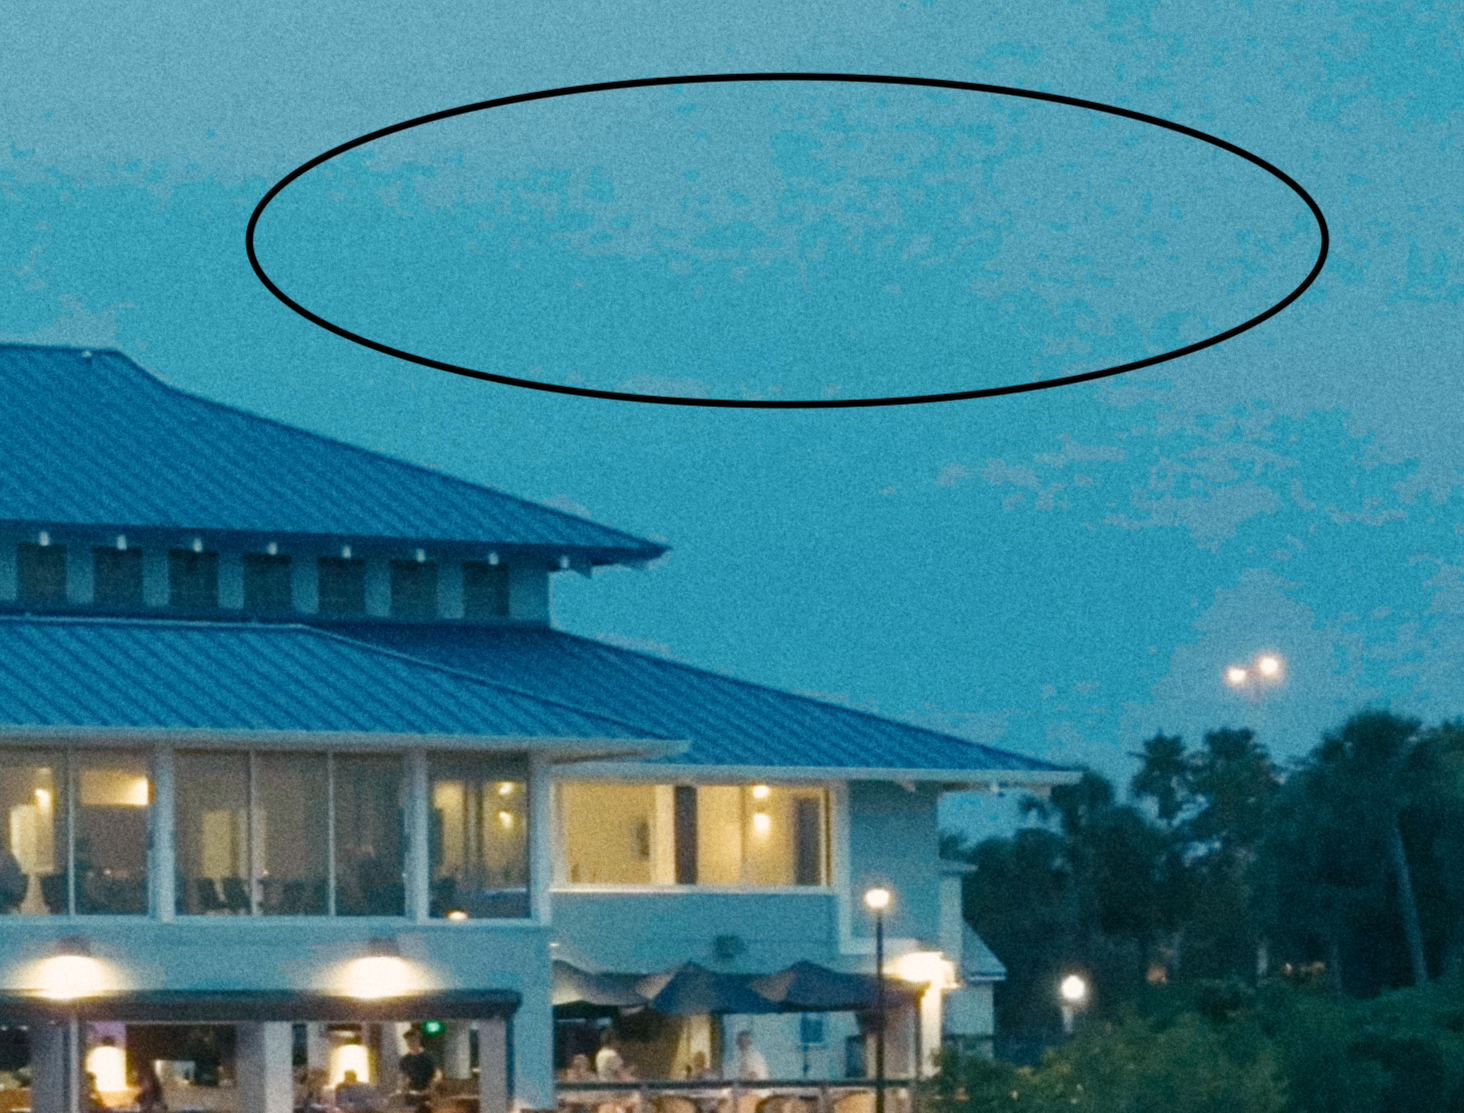
Halation
What is Halation?
Halation is an effect in film where bright areas seem to
have a red glow. This is caused by light reflecting off the film base and back into the
red layer. This image provides a good demonstration of how the effect works in
reality:

Photo credit: Wikipedia
An example of halation:

Cropped:

Photo from Westworld Season 3 (2020) using Kodak Vision3 500T 5219
Authors: © Denis Svinarchuk, © Pavel Kosenko, © Dmitry Novak
Example from Dehancer
Blog.
Emulating Halation
The halation algorithm I use is simple but it works well. The halation effect reminds me of techniques to render bloom used in computer graphics (de Vries). Therefore, I use a modified version of the bloom algorithm to emulate halation.
First, threshold the image, since only bright portions of
the image should have the halation effect. I apply a soft threshold, so regions below
low are black, regions above high are the original color, and
regions in between are linearly interpolated. This prevents some areas of an image
appearing unusually bright and red, especially in areas with gradual color changes such
as a sky. For my halation emulation, I set the parameters to low = 0.6 and
high = 0.7 (where RGB values
are clamped between [0, 1]):
Next, blur the thresholded image to provide a "bleeding over" effect. I
use the kernel:
$$e^{-\frac{\text{dist}}{\sigma}}$$
Where
$\sigma$
is a user-definable parameter, where larger values of $\sigma$
indicate a stronger blur. Using this kernel instead of a more typical kernel (such
as a Gaussian blur) produces a more natural-looking image. My film emulation
software sets the parameter to $\sigma=20.0$.
Next, the thresholded image must be redshifted. This creates the characteristic red glow from halation. Multiply each channel of the image by a certain constant. I found that multiplying by $[1.0, 0.05, 0.02]$ works best (in an RGB image).
Finally, the halation is added back to the original image using a weighted sum:
$$ \text{Image Halation} = \text{Halation component} + \alpha\,H $$
Together, these parameters create a subtle but noticeable halation effect in the final image. It does artificially brighten and redshift bright parts of the image, which may be undesirable. Omitting halation in the areas that were originally thresholded can mitigate this issue, but introduces the new issue of visible edges artifacts where halation begins.
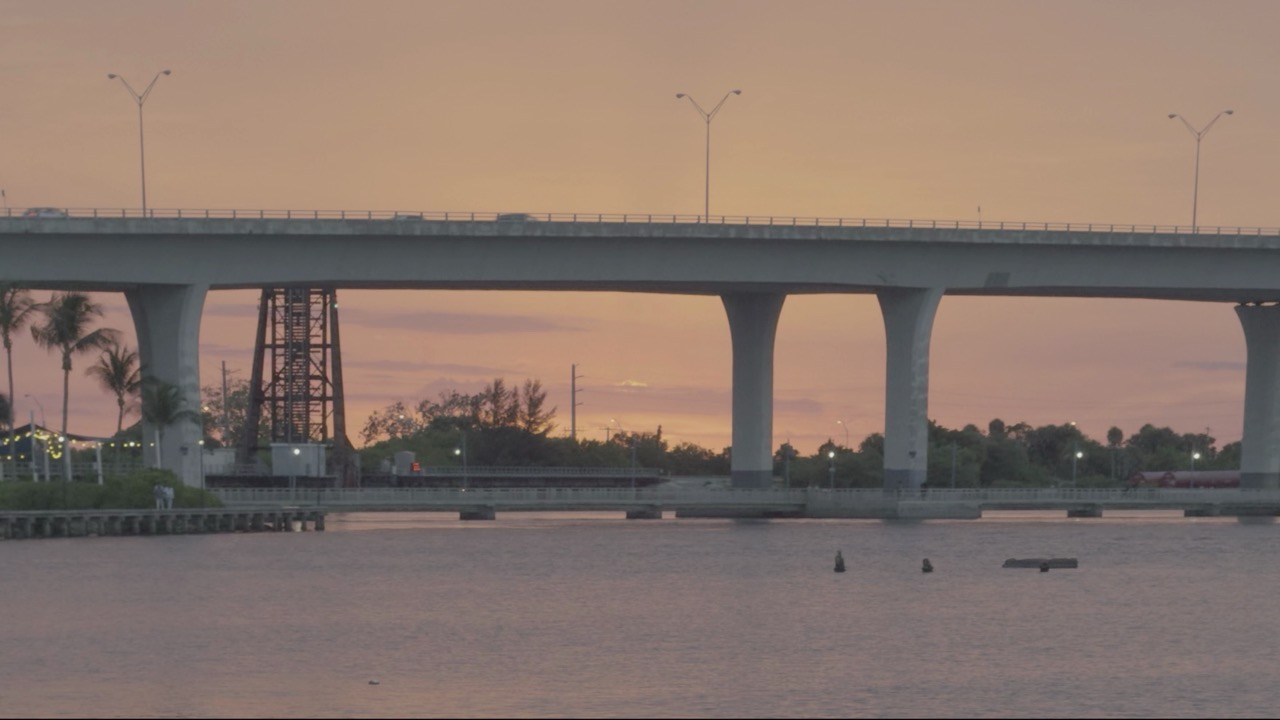
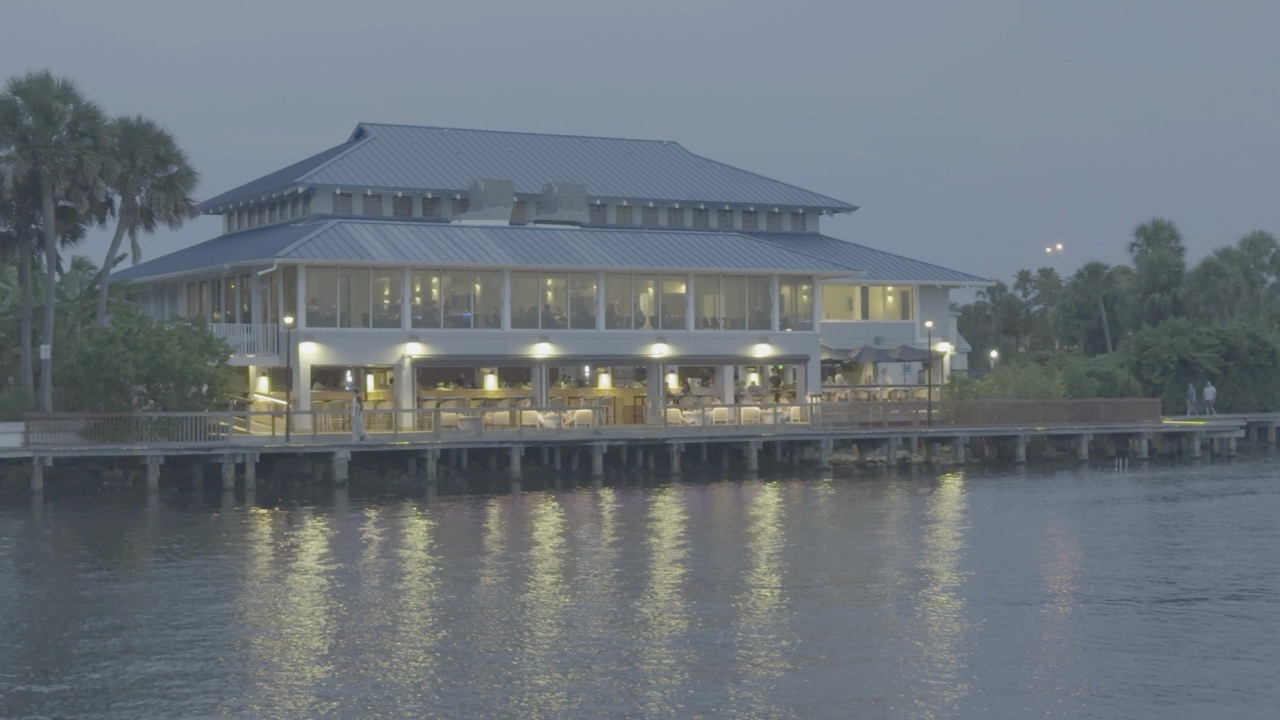
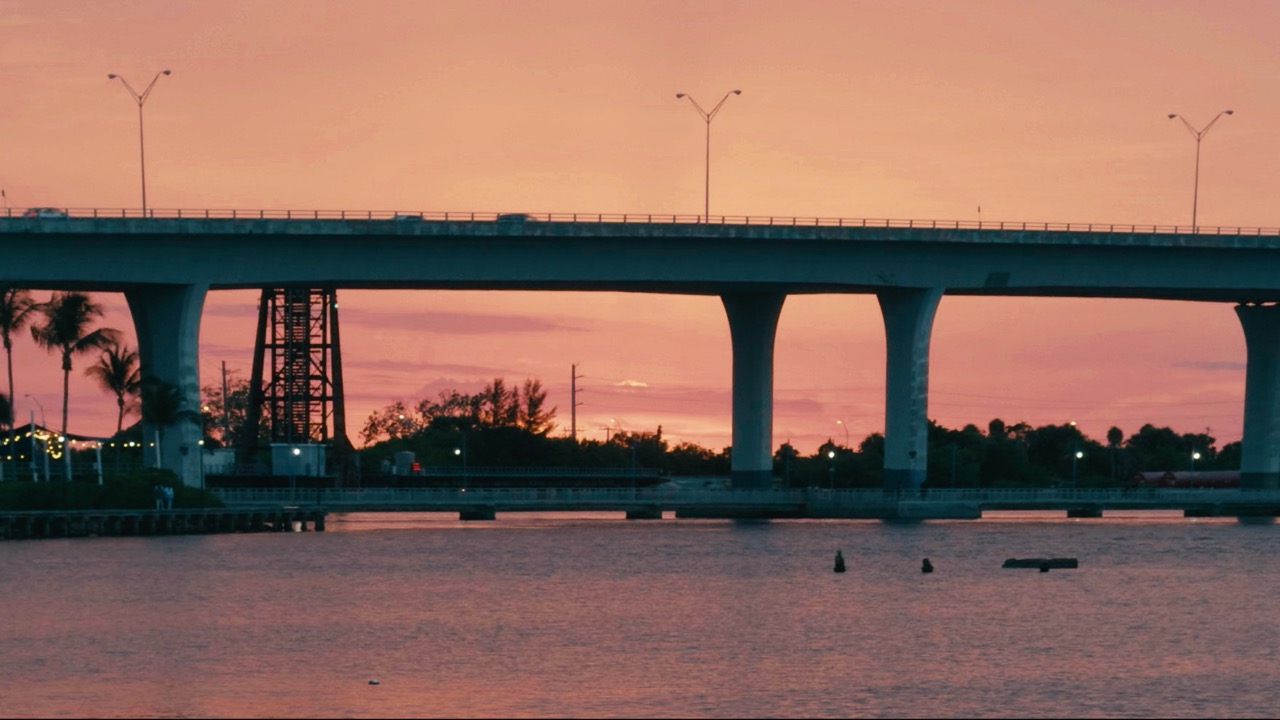
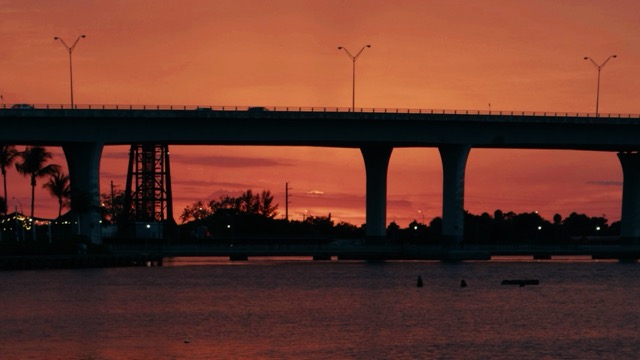
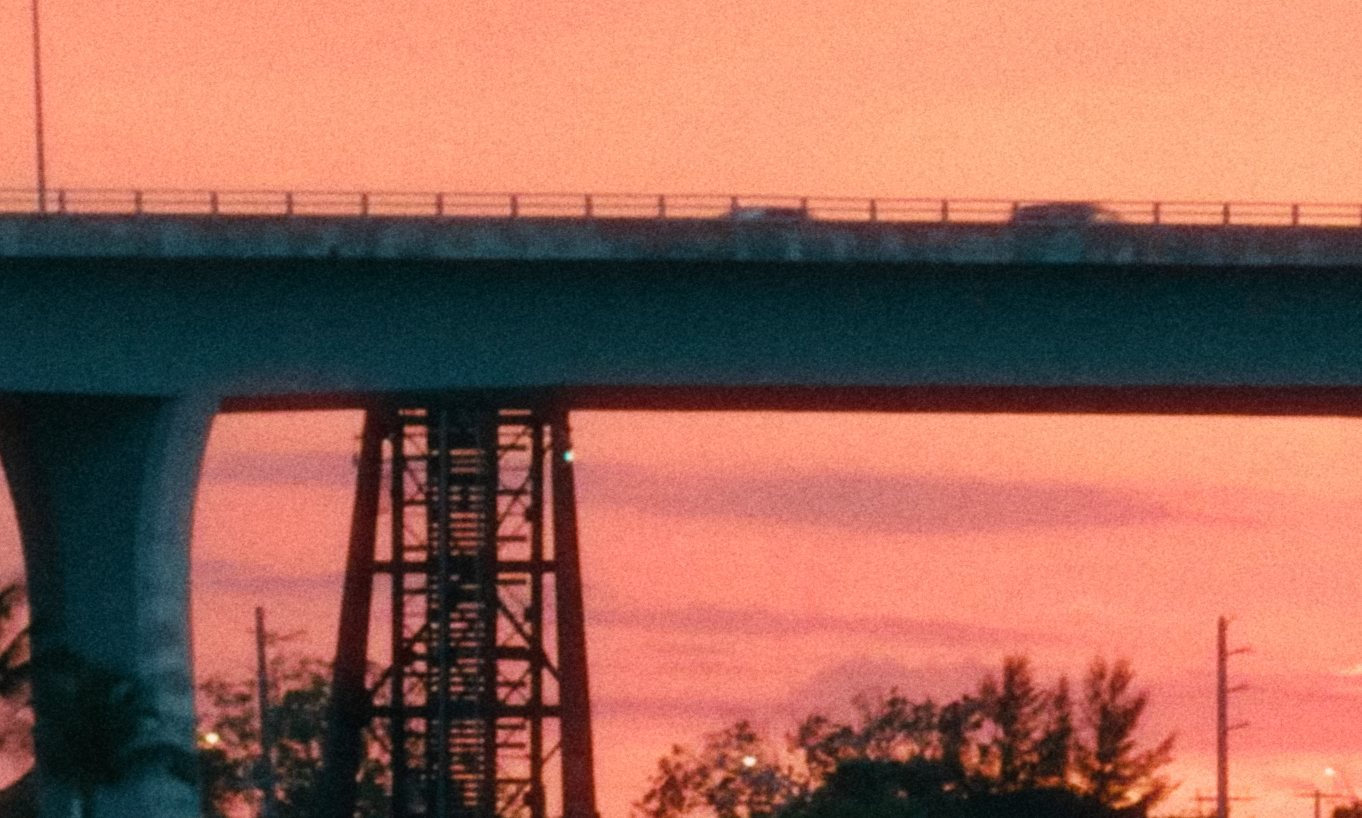
The halation algorithm produces the following before/after. Notice the subtle glow around the top and bottom of the bridge.
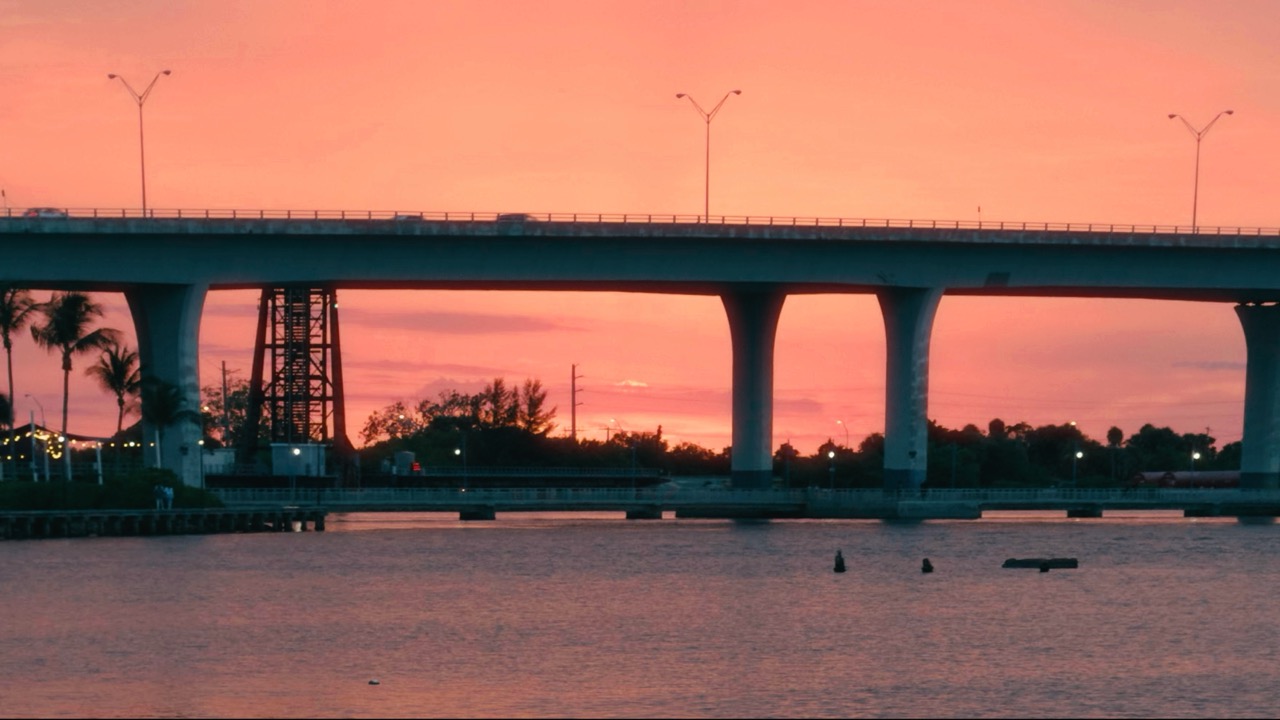 LUT Applied (Rec.709)
Halation Applied
LUT Applied (Rec.709)
Halation Applied
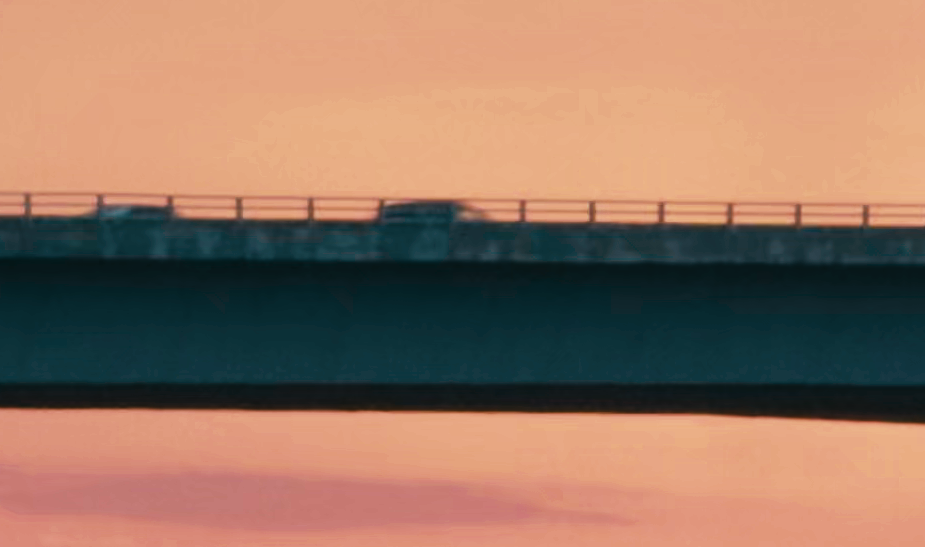
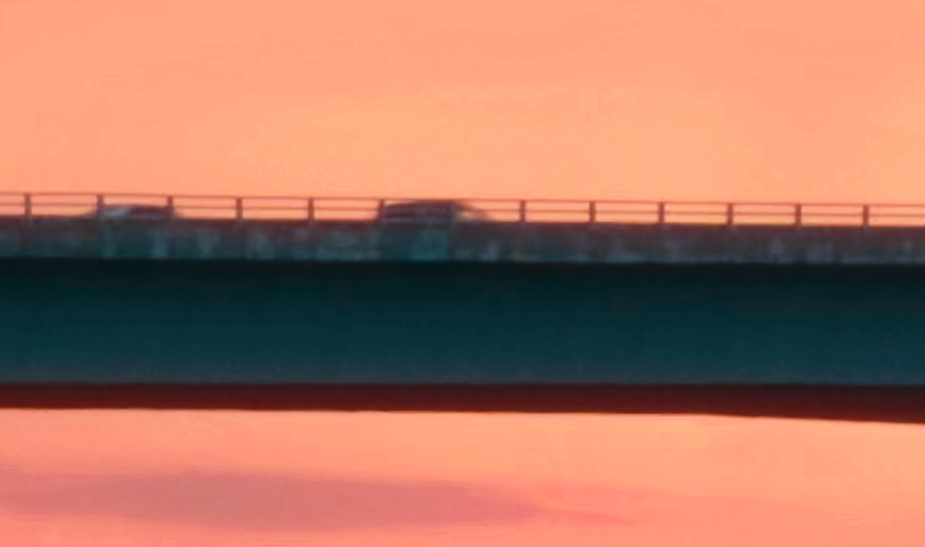 LUT Applied (Rec.709) (Cropped)
Halation Applied (Cropped)
LUT Applied (Rec.709) (Cropped)
Halation Applied (Cropped)
Denoising
Ironically, the first step to adding grain is to remove noise.
Having both noise from the digital camera as well as the noise of film grain can be distracting.
I use OpenCV's cv::xphoto::dctDenoising function with the parameters sigma=7.5
and psize=8. At times, the denoising is aggressive and creates a blurry image, but
this is masked by the addition of film grain. This may also be a beneficial artifact, since film
images are softer than a digital photograph.
Since denoising is subtle in the example image, only the cropped image is shown.
 Halation Applied (Cropped)
Denoised (Cropped)
Halation Applied (Cropped)
Denoised (Cropped)
Film Grain Emulation
I use a modified technique from a paper titled "Realistic Film Grain Rendering" published in the Image Processing On Line journal (Newson et al. 2017). It uses a Monte Carlo technique to synthesize film grain by simulating the literal grains of film, which takes roughly three minutes to compute on my M4 MacBook Pro using all CPU cores.
The technique in Newson 2017 is for a single color channel only. The paper proposes a solution:
"Since the grains only react to incoming photons of a certain color, it is a good approximation to simulate the film grain in each color channel independently."
However, my testing disagrees with this conclusion: applying film grain to each channel independently creates an undesirable color noise effect, not seen in most film photography. An interesting exception are some images taken by a friend of mine on a Fujifilm QuickSnap Flash 400 disposable camera, where color noise is clearly present. Notice how the film grain appears to distort the color.

Photo credit: Natalia Builes
In my film emulation software, do the following steps to apply film grain:
- Convert the image from linear to Rec.709.
- Create a new image that is monochrome (from the image in step 1).
- Apply film grain.
- Subtract the film grain image (step 3) from the monochrome image (step 2) to get a grain texture.
- Multiply the grain texture (step 4) by a constant then add it to the original image to get monochrome grain on a color image. This step uses the same formula as the last step of halation.
- Convert the image from step 6 from Rec.709 to linear.
In real film, there is little grain in the deep shadows of an image (Sudhakaran 2025). Applying film grain to a linear image exaggerates the grain in shadows when converting back to Rec.709. Converting to Rec.709 before applying film grain is a simple fix (step 1).
The application of film grain to the monochrome image (step 3) and adding the film grain texture to the original image (step 5) required a lot of trial and error with parameter adjustment. Here's what works:
Step 3: I have an average grain radius $\mu R=0.14$ and the standard deviation of the grain radius equal to $\sigma R=0.075 \cdot \mu R$. I use $\sigma_{filter} = 0.875$, which removes high-frequency noise from the image. I also use $N=350$ Monte Carlo iterations, which balances performance and quality.
Step 5: I use the constant 0.525,
which adds film grain without it being too exaggerated. This parameter could be reduced some
more, too.
 Denoised
Grain Added
Denoised
Grain Added
 Denoised (Cropped)
Grain Added (Cropped)
Denoised (Cropped)
Grain Added (Cropped)
The Full Pipeline
To summarize, the full pipeline is as follows:
- Apple ProRes Log → Rec.709 using a filmic LUT
- Rec.709 → Linear
- Apply a halation
- Apply denoising
- Synthesize film grain
- Linear → Rec.709 for the final output image
After I run my algorithm, it is usually necessary to make minor adjustments to the colors to improve the image.
Conclusion
I wrote this article to help you emulate film with your own software or with professional tools. Feel free to contact me if you notice any improvements I can make to the article (contact form is on my website). This project is open source on GitHub if you would like to view exactly how I implemented these steps: linked here.